How to Make Delicious Mummy Cookies Fast
If you’re looking for a fun, fast, and festive treat to perfectly capture the spirit of Halloween, these Mummy Cookies are an absolute must-try. Combining the simple delight of buttery sugar cookies with an adorable mummy design, they’re easy to whip up even if you’re short on time. Whether you’re hosting a spooky party or just want a sweet way to celebrate the season, these Mummy Cookies deliver both in taste and in charm. They’re quick to bake, irresistibly cute, and simply perfect for sharing with friends and family!
Why You’ll Love This Recipe
- Easy and Quick to Make: This recipe uses common ingredients and simple steps that won’t keep you in the kitchen all day.
- Festive and Fun: The mummy design brings a playful Halloween touch that kids and adults both enjoy.
- Customizable: You can easily adjust flavors, decorations, or dietary preferences without losing the core charm.
- Perfect for Parties: These cookies make fantastic treats for school events, office gatherings, or family get-togethers.
- Great Texture: Soft with a slight crunch, the Mummy Cookies balance flavor and texture beautifully.
Ingredients You’ll Need
These Mummy Cookies require just a few basic ingredients, each playing an essential role in creating the perfect cookie dough and tasty decoration. Having these staples ready makes it easy to bake a batch whenever the Halloween craving strikes.
- All-Purpose Flour: The base of your cookie dough that provides structure and a tender crumb.
- Butter: Adds richness and moisture, ensuring a soft yet crisp texture.
- Sugar: Sweetens the dough for a balanced flavor without overpowering.
- Egg: Binds everything together and contributes to the cookie’s chewiness.
- Vanilla Extract: Offers a warm, aromatic depth that enhances the sweet notes.
- Baking Powder: Gives the cookies their slight rise and lightness.
- White Icing or Candy Melts: Used for the mummy’s bandages, creating that classic spooky look.
- Mini Chocolate Chips or Edible Eyes: Makes for the creepy-cute eyes that complete the mummy face.
Variations for Mummy Cookies
Mummy Cookies are wonderfully adaptable, so don’t hesitate to experiment. Whether you want them gluten-free, extra spooky, or with a twist in flavor, it’s easy to tailor this recipe to your liking.
- Gluten-Free Option: Swap the all-purpose flour with a gluten-free blend to accommodate dietary needs.
- Chocolate Mummy Cookies: Add cocoa powder to the dough for a rich, chocolaty base variation.
- Spiced Cookies: Incorporate cinnamon, nutmeg, or pumpkin pie spice for a cozy, autumnal flavor.
- Peanut Butter Mummy Cookies: Replace some butter with peanut butter for a nutty twist.
- Vegan Version: Use vegan butter, flax eggs, and dairy-free candy melts for plant-based treats.

How to Make Mummy Cookies
Step 1: Prepare the Dough
Start by creaming the softened butter and sugar together until fluffy and light. Beat in the egg and vanilla extract until fully combined. Gradually add the flour and baking powder, mixing until you get a smooth dough that’s easy to handle.
Step 2: Shape the Cookies
Take small portions of dough and roll them into oval shapes, mimicking a mummy’s body. Place them on a parchment-lined baking sheet, leaving space for spreading.
Step 3: Bake
Bake the cookies in a preheated oven at 350°F (175°C) for 8-10 minutes or until edges just start to turn golden. Avoid overbaking to keep them soft and tender inside.
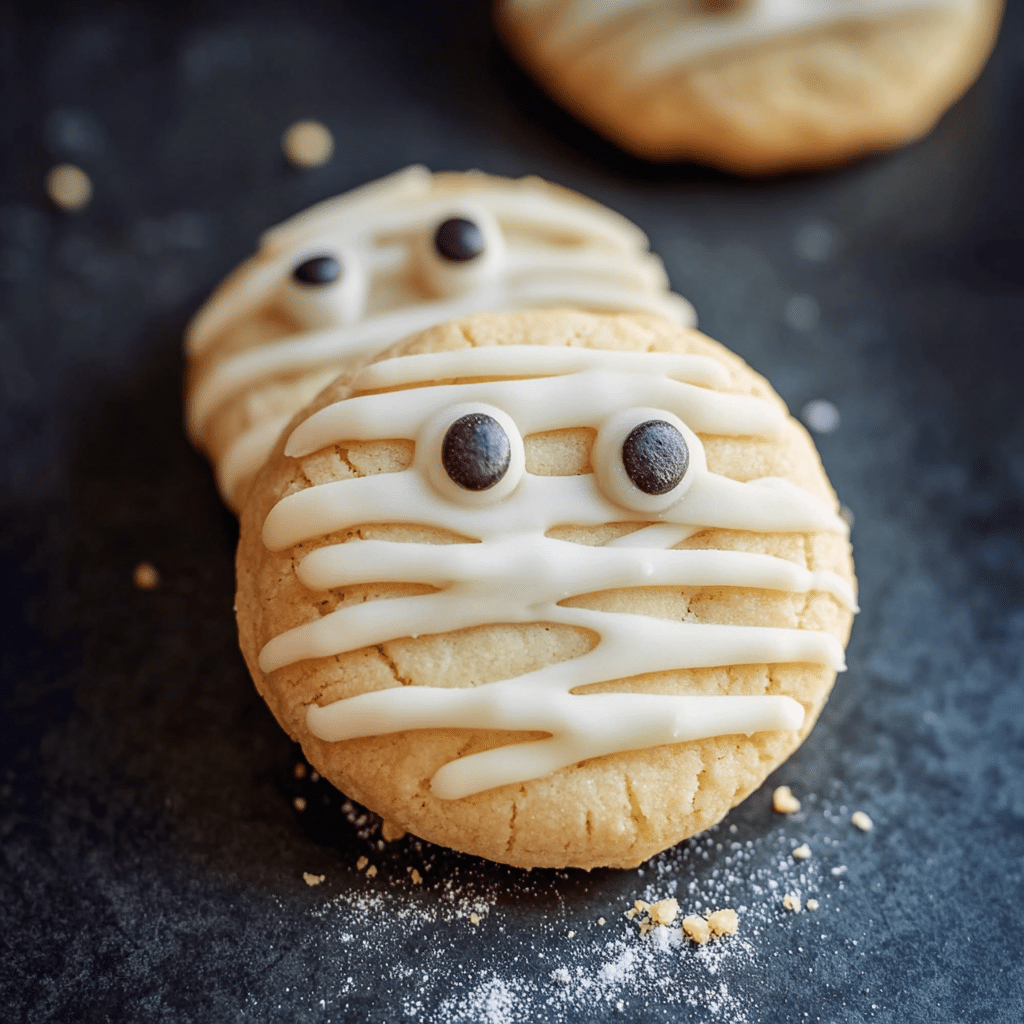
Step 4: Decorate Like a Mummy
Once the cookies have cooled completely, drizzle or pipe thin lines of white icing or melted candy over each cookie to create the mummy’s bandages. Use mini chocolate chips or edible eyes to place two eyes peeking through the bandages for that classic mummy look.
Pro Tips for Making Mummy Cookies
- Chill the Dough: Refrigerate for 15-20 minutes before shaping to make rolling and shaping much easier.
- Use Parchment Paper: Baking on parchment ensures the cookies don’t stick and helps achieve even baking.
- Thin Icing Lines: Use a piping bag with a small tip or a zip-lock bag with a tiny corner cut out for precise bandage lines.
- Cool Completely Before Decorating: Warm cookies can melt the icing, so patience ensures the best results.
- Try Food-Safe Markers for Eyes: If you prefer less mess, edible markers can create expressionful eyes easily.
How to Serve Mummy Cookies
Garnishes
Sprinkle a touch of edible glitter or Halloween-themed sprinkles around the edges to add extra festive sparkle and fun without overwhelming the design.
Side Dishes
Pair your mummy cookies with a spooky punch, hot chocolate topped with whipped cream and candy corn, or a simple glass of cold milk to balance sweetness.
Creative Ways to Present
Arrange the cookies on a black or orange platter with plastic spider rings or fake cobwebs for a visually striking Halloween display that instantly catches attention.
Make Ahead and Storage
Storing Leftovers
Store your Mummy Cookies in an airtight container at room temperature for up to 5 days to keep them soft and flavorful.
Freezing
You can freeze undecorated cookies by placing them in a single layer on a baking sheet, freezing until firm, then transferring to a freezer-safe bag for up to 3 months. Decorate after thawing.
Reheating
Warm cookies for a few seconds in the microwave or in a low oven (about 300°F/150°C) to bring back freshness, but avoid reheating decorated cookies to protect the icing detail.
FAQs
Can I use store-bought cookie dough for Mummy Cookies?
Absolutely! Store-bought dough works well if you’re in a hurry; just shape your dough pieces into mummy forms and decorate as usual.
What if I don’t have candy melts for the mummy’s bandages?
You can use white royal icing, white chocolate chips melted gently, or even store-bought white frosting piped carefully to mimic the bandages.
Can children help make Mummy Cookies?
Definitely! Decorating is especially fun for kids, and shaping the dough into mummy bodies is a great way to engage little hands.
How do I make my cookies more crunchy?
Bake a minute or two longer for crisper edges but watch closely to avoid burning; you can also add a tiny bit more butter for a crispier texture.
Are these cookies allergy-friendly?
They include common allergens like eggs and dairy, but with ingredient substitutions (like vegan butter and flax eggs), you can customize the recipe to be allergy-friendly.
Final Thoughts
Making Mummy Cookies is such a joyful way to bring a little Halloween magic into your kitchen. With simple ingredients, straightforward steps, and plenty of room for creativity, this recipe is sure to become a festive favorite. Don’t wait — gather your ingredients, roll up your sleeves, and start baking these charming little treats that everyone will adore!